Build a High-ROI Automated Post-Purchase Sequence for Shopify & WooCommerce
The moment a customer clicks 'buy' isn't the end of a transaction; it's the beginning of a relationship. Too many Shopify and WooCommerce stores go silent after the order confirmation, missing a crucial opportunity to build loyalty and drive repeat sales. An automated postpurchase sequence is a seri

The moment a customer clicks 'buy' isn't the end of a transaction; it's the beginning of a relationship. Too many Shopify and WooCommerce stores go silent after the order confirmation, missing a crucial opportunity to build loyalty and drive repeat sales. An automated post-purchase sequence is a series of targeted, automated messages sent to a customer after they buy, designed to enhance their experience and increase lifetime value. This guide will show you exactly how to build a powerful, product-specific follow-up workflow using no-code tools like Zapier or Make.com, turning one-time buyers into your most valuable repeat customers.
Key Takeaways: Your Post-Purchase Automation Launchpad
- Segment customers based on the specific product SKU they purchased to send hyper-relevant usage tips, review requests, and cross-sells.
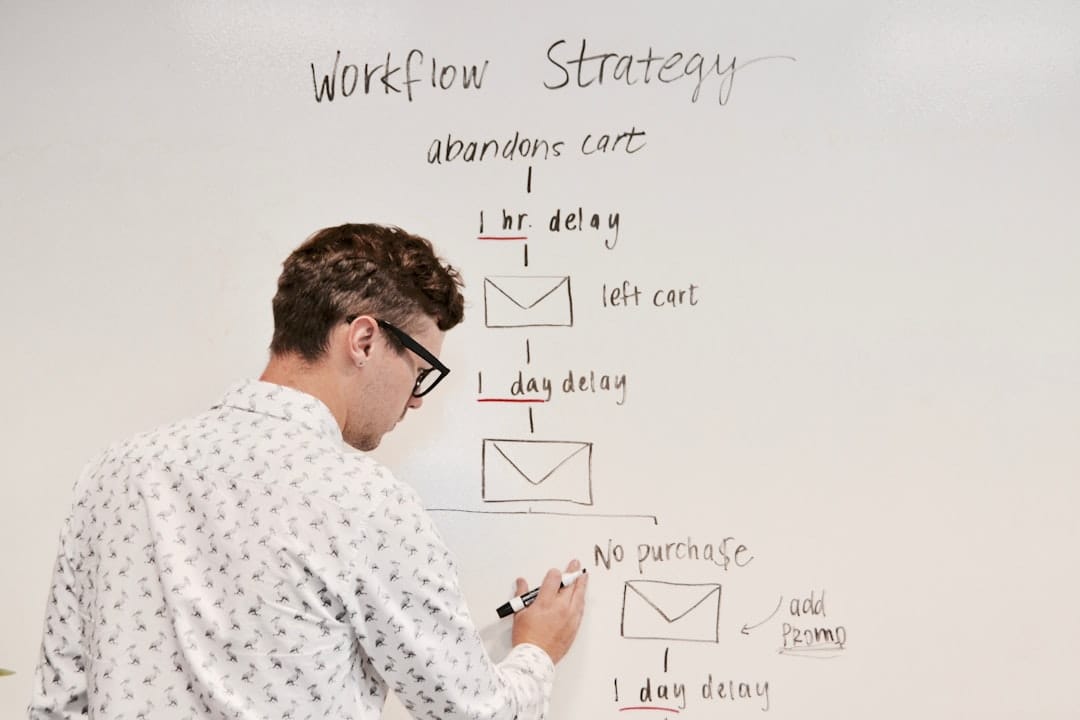
- Map your email timing to the customer's real-world experience. Send usage tips immediately, a delivery check-in after the package arrives, and a review request 7-10 days later.
- Use Zapier or Make.com to connect your Shopify or WooCommerce store directly to your email platform (like Klaviyo or Mailchimp) without writing any code.
- Start with a simple three-part sequence: 1) Thank You + Product Tips, 2) Delivery Check-in + Review Request, 3) Smart Cross-Sell Offer.
- The primary goal is not just a second sale. Focus on delivering value, gathering product feedback, and building a strong brand relationship to naturally increase customer lifetime value.
- Measure success not just by revenue from cross-sells, but also by email engagement rates, review generation volume, and the change in repeat purchase rate.

Table of contents
- What Are the Goals of a Product-Specific Follow-Up?
- How Do You Map Your Post-Purchase Customer Journey?
- What Are the Essential Emails in a Product-Based Sequence?
- What Trigger and Logic Drive the Automation?
- Zapier vs. Make.com: Which Automation Tool Is Right for You?
- How to Set Up the Shopify/WooCommerce Trigger in Zapier
- How to Build Conditional Paths for Different Products in Zapier
- How to Set Up the Shopify/WooCommerce Trigger in Make.com
- How to Use Filters and Routers for Product Segmentation in Make.com
- How Do You Measure the ROI of Your New Sequence?
- Conclusion and next steps
- Frequently asked questions
- Additional Resources
What Are the Goals of a Product-Specific Follow-Up?
The primary goal is to increase customer lifetime value by creating a highly relevant post-sale experience that encourages loyalty and repeat purchases. By understanding what a customer has bought, you can tailor your communication to be as helpful and relevant as possible, directly addressing their needs and interests. This personal touch fosters goodwill and makes them more likely to return for future purchases.
Combat buyer's remorse by immediately reassuring the customer and providing value-added content (like usage tips) specific to the product they chose. A timely follow-up can solidify their decision and prevent them from having second thoughts. For example, if a customer buys a complex piece of electronics, an immediate email with a link to setup guides and video tutorials can alleviate potential frustration.
Generate a steady stream of authentic product reviews for specific items by automating requests after the customer has had time to use their purchase. Honest reviews provide invaluable social proof for other potential buyers. The key is to ask at the right time, after they've had a chance to experience the product's benefits and drawbacks.
Create intelligent cross-sell opportunities by recommending complementary products based on their actual purchase history, rather than generic store-wide promotions. If a customer buys a high-end coffee maker, recommending premium coffee beans or a grinder is far more effective than a random advertisement for unrelated items.
How Do You Map Your Post-Purchase Customer Journey?
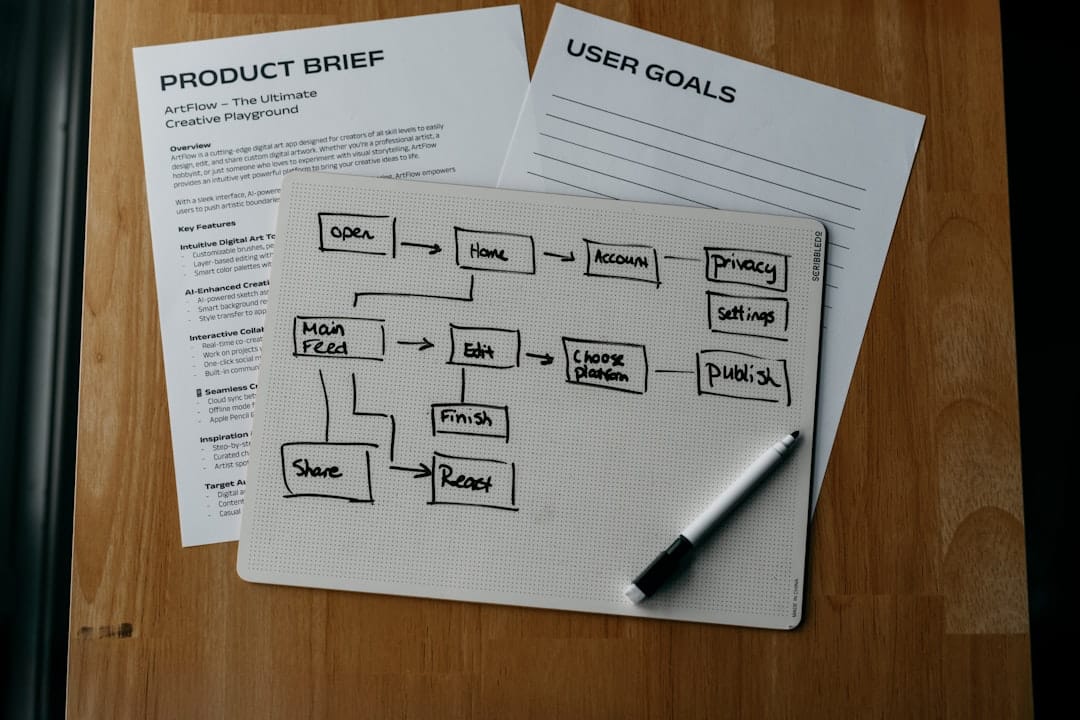
You map your journey by creating a visual timeline of key customer touchpoints from the moment of purchase to long-term engagement. This serves as your automation blueprint, ensuring each message is delivered at the optimal time and context. This proactive approach helps anticipate customer needs and questions.
Identify the core stages: 1. Immediate Purchase (0-1 hour), 2. Shipping & Transit (1-5 days), 3. Delivery & Unboxing (Day of delivery), 4. First Use & Experience (1-7 days post-delivery), 5. Long-Term (30+ days). Each stage represents a different customer mindset and set of potential needs or questions.
For each stage, define the customer's mindset and the ideal message. For example, at the 'Unboxing' stage, they are excited; a simple 'Your order has arrived!' email with a link to a quick-start guide is perfect. This aligns the communication with their immediate feelings and practical needs.
This map becomes a 'Summary Framework' visual, illustrating the flow of communication and ensuring your emails are timely and context-aware. For instance, a customer who just received a new skincare product might appreciate tips on application on day 3, while someone who bought a durable appliance might need a warranty reminder or advanced usage tips closer to day 30.
What Are the Essential Emails in a Product-Based Sequence?
A foundational sequence includes a thank you with product tips, a delivery check-in, a specific review request, and a personalized cross-sell offer. These core messages address immediate needs, gather feedback, and encourage future engagement. Starting with these elements creates a robust, yet manageable, automation strategy.
Email 1 (Sent Immediately): The 'Thank You & First Steps'. Confirm the order and include a link to a guide or video showing how to get the most out of '[Product Name]'. This reassures the customer that their order is confirmed and immediately provides value related to their purchase. For example, after buying a specialized baking pan, a link to a recipe specifically for that pan would be ideal.
Email 2 (Sent 2 Days After Delivery): The 'How's It Going?' & Feedback Request. Check that the product arrived safely and ask for a review, linking directly to the product page. This timing allows the customer some time to experience the product. For a new jacket, you might ask if they've had a chance to wear it and if they'd consider leaving a review on its style or fit.
Email 3 (Sent 14-21 Days After Purchase): The Smart Cross-Sell. Offer a discount on a complementary item. For example, 'Since you bought our premium coffee beans, you might love our high-end grinder.' This suggestion is highly relevant because it directly relates to their previous purchase, increasing the likelihood of a click and subsequent sale [starshipit.com/us/blog-content/post-purchase-email-automation-sequence-flow].
For consumable products, add an optional 'Replenishment Reminder' email triggered based on the typical product lifecycle (e.g., 30 or 60 days). If a customer purchased vitamins, a reminder email around the time they're likely to run out encourages a repeat purchase.
What Trigger and Logic Drive the Automation?
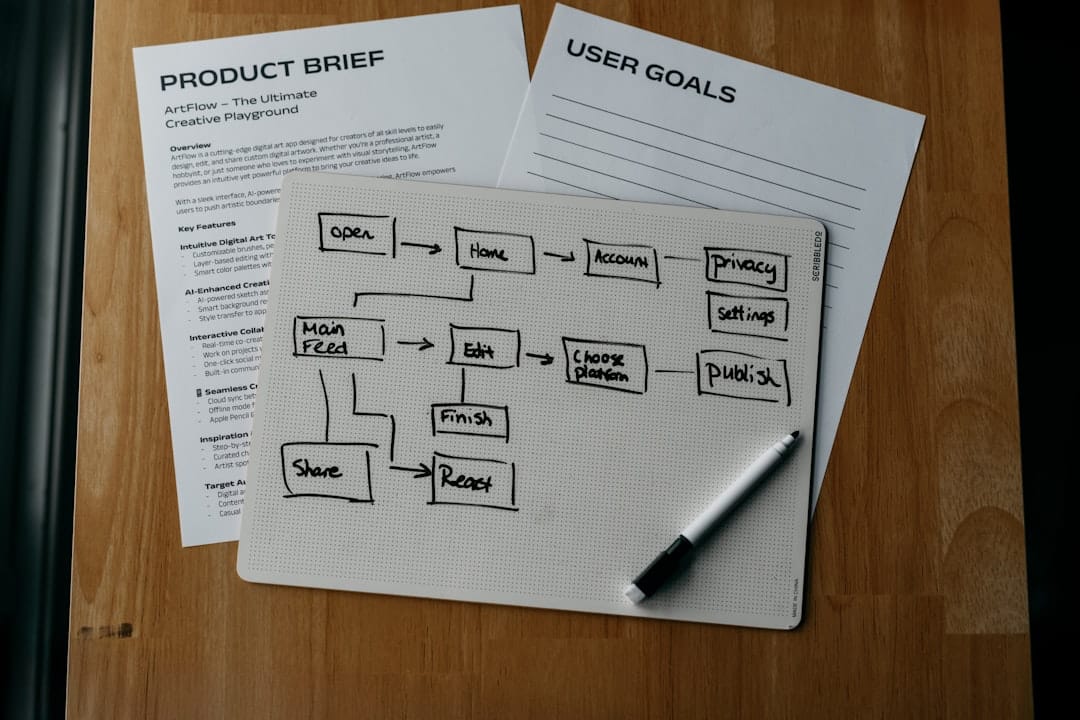
The automation is driven by a 'New Order' trigger in Shopify or WooCommerce, followed by conditional logic that routes customers into different paths based on what they bought. This allows for highly specific follow-up sequences tailored to individual products or product categories.
The core trigger is the 'New Paid Order' or 'New Order' event, which provides all the necessary data: customer email, order details, and product SKUs. For instance, when a new order comes in through Shopify, that event signals your automation tool to start the process. This data is then parsed to decide the customer's next steps.
The logic uses 'If/Then' rules to segment customers. For example: IF 'Line Items SKU' contains 'SHIRT-BLUE-LG', THEN add customer to 'Blue Shirt Sequence'. This means if an order includes a specific blue shirt SKU, the customer automatically enters a workflow designed for blue shirt buyers.
This allows you to create unique follow-up experiences for different product categories, best-sellers, or high-value items. A customer buying a pair of running shoes might receive tips on shoe care and recommended running socks, while a customer buying a formal dress might receive information on garment care and complementary accessories.
Zapier vs. Make.com: Which Automation Tool Is Right for You?
Make.com is generally better for complex, multi-step visual workflows and offers a more generous free tier, while Zapier is prized for its simplicity and vast library of app integrations. Both are powerful no-code tools capable of building sophisticated post-purchase sequences.
User Interface: Zapier uses a simple, linear step-by-step builder, which is very beginner-friendly. Make.com uses a visual, drag-and-drop canvas that is more powerful for visualizing complex logic like routers and parallel branches. If you prefer a straightforward, linear approach, Zapier might be easier to start with. Make.com's visual interface can be more intuitive for mapping out intricate decision trees.
Pricing Model: Zapier prices per 'Task' (a completed action). Make.com prices per 'Operation' (a single data manipulation), which can make complex workflows more cost-effective. For example, a Zapier task might involve sending an email after a customer purchase, while a Make.com operation would be a single step within that process. Understanding these models is key to choosing the most budget-friendly option for your order volume.
Here's a quick comparison:
| Feature | Zapier | Make.com (formerly Integromat) |
|---|---|---|
| Pricing | Per Task | Per Operation |
| Interface | Linear, step-by-step | Visual, drag-and-drop canvas |
| Complexity | Good for simpler to moderate workflows | Excellent for complex, multi-branch flows |
| Free Tier | Limited tasks | More generous operations/tasks |
| Learning Curve | Lower | Moderate |
How to Set Up the Shopify/WooCommerce Trigger in Zapier
You set up the trigger by creating a new 'Zap', selecting the Shopify or WooCommerce app, and choosing the 'New Paid Order' event as the starting point. This action is the initial handshake between your store and Zapier, initiating the automation.
Step 1: In your Zapier dashboard, click 'Create Zap' and search for your e-commerce platform app (e.g., Shopify). This action tells Zapier which platform to monitor for new data.
Step 2: Under 'Event,' select 'New Paid Order' (or a similar trigger) and connect your store account, granting Zapier the necessary permissions. You’ll be prompted to log into your Shopify or WooCommerce account to authorize the connection.
Step 3: Test the trigger. Zapier will pull in a recent order, allowing you to see all the available data fields, which you'll use in subsequent steps. This is a crucial step to ensure that Zapier is correctly receiving order information, such as customer details, product SKUs, and quantities.
How to Build Conditional Paths for Different Products in Zapier
You build conditional workflows using Zapier's built-in 'Paths' feature, which creates distinct branches based on the product data from your trigger step. This allows your automation to branch out based on specific product details.
Add a new step and search for 'Paths'. This will split your Zap into two or more parallel workflows (Path A, Path B, etc.). Each path represents a different outcome or sequence based on your defined rules.
For each path, set up a rule. For example, configure Path A to only continue if the 'Line Items Product Name' text contains 'Leather Boots'. This condition ensures that only orders containing "Leather Boots" will proceed down Path A of your Zap.
Within each path, add the specific actions for that product segment, such as enrolling the customer in a targeted Mailchimp sequence or sending them a customized email via Gmail. So, for the 'Leather Boots' path, you might send an email with tips on leather care and a discount on boot polish.
How to Set Up the Shopify/WooCommerce Trigger in Make.com
In Make.com, you set up the trigger by creating a new 'Scenario', adding the Shopify or WooCommerce module, and selecting the 'Watch Orders' trigger. This initiates the connection between your e-commerce platform and Make.com's automation engine.
Step 1: From the Scenario editor, click the large plus sign and search for the Shopify module, then select 'Watch Orders' as the trigger. This module is designed to detect new order data coming from your store.
Step 2: Create a webhook connection, which Make.com will provide for you to paste into your Shopify or WooCommerce admin panel. This webhook acts as a secure channel, allowing your store to instantly send order data to Make.com as it happens.
Step 3: Run the scenario once to pull in sample order data. You can then click on the resulting data bubble to inspect the 'bundles' and see all the order information available for your workflow. This verification step ensures Make.com is receiving the correct data structure and all necessary details about each order.
How to Use Filters and Routers for Product Segmentation in Make.com
You use a 'Router' module to split your scenario into multiple branches, and then apply 'Filters' to each branch to control which orders proceed down each path. This allows for sophisticated branching logic based on product attributes.
After your Shopify 'Watch Orders' trigger, add a 'Router' module. This creates a central hub from which multiple paths can branch out, enabling different workflows for different product types.
On the connecting line between the Router and the next module (e.g., a Gmail module), click to 'Set up a filter'. This filter intercepts the data flow and determines whether it should proceed based on your defined criteria.
In the filter setup, create a condition. For example: Label: 'Skincare Products', Condition: 'Line items[].SKU' (from the trigger data) 'Text operators: Contains' 'SKIN-'. This ensures only orders with SKUs containing "SKIN-" proceed down this particular branch of your scenario [mailchimp.com/resources/post-purchase-email/].
How Do You Measure the ROI of Your New Sequence?
You measure the ROI by tracking the direct revenue generated from cross-sell emails and the indirect value from increased reviews, engagement, and customer loyalty. It’s crucial to look beyond just immediate sales to understand the full impact.
In your email marketing platform, monitor key funnel metrics: open rates for each email, click-through rates on product links and review requests, and unsubscribe rates. High engagement across the sequence indicates your content is relevant and valuable to the customer.
Track attributable revenue: Use UTM parameters in your cross-sell email links to clearly identify sales that originated from your automation sequence in Google Analytics. This allows you to directly link specific orders back to your automated follow-ups.
Quantify indirect lift: Monitor the rate of new product reviews generated post-launch. An increase in reviews and social proof has a proven, albeit indirect, positive impact on overall store conversion rates [fluentcrm.com/blog/post-purchase-email-sequence/].
Conclusion and next steps
Implementing a product-specific automated post-purchase sequence is a strategic move that transforms one-time buyers into loyal, repeat customers. By leveraging tools like Zapier or Make.com, you can create personalized communication flows that enhance customer satisfaction, gather valuable feedback, and drive additional revenue from cross-sells and repeat purchases. This automation not only streamlines your marketing efforts but also significantly boosts your store's long-term profitability.
Here are your concrete next steps:
- Map your customer journey: Outline the stages your customers go through after purchasing, identifying key touchpoints for communication.
- Identify your core sequence: Decide on the essential emails for your initial sequence, focusing on value, feedback, and smart recommendations.
- Choose your automation tool: Select Zapier or Make.com based on your needs for complexity, budget, and interface preference.
- Build your first workflow: Set up the trigger for new orders and create conditional logic for at least one product category to start.
- Monitor and optimize: Continuously track your sequence's performance metrics (open rates, clicks, revenue, reviews) and make adjustments to improve results.
Frequently asked questions
How many emails should be in a post-purchase sequence?
Start with 3 to 4 emails. This is enough to provide value, request feedback, and offer a cross-sell without overwhelming the customer. You can always add more later, such as replenishment reminders or loyalty program updates [starshipit.com/us/blog-content/post-purchase-email-automation-sequence-flow].
How long should I wait between sending emails?
Base your timing on the customer's experience. Send the first email immediately, the second a couple of days after delivery, and the third 1-2 weeks after that. Avoid spacing them too closely to prevent annoyance [mailchimp.com/resources/post-purchase-email/].
Can I use my existing email tool like Mailchimp or Klaviyo?
Yes. Zapier and Make.com are the 'glue' that connects your Shopify/WooCommerce store to your email service provider. The trigger happens in your store, the logic is handled by Zapier/Make, and the email is sent by your connected tool.
What's the difference between a transactional and a marketing email?
Transactional emails (order/shipping confirmations) are essential notifications related to an order. Marketing emails (like review requests or cross-sells) are promotional. Regulations like GDPR have different rules for each, so it's important to ensure customers have opted-in to marketing communications [starshipit.com/us/blog-content/post-purchase-email-automation-sequence-flow].
Will this automation slow down my website?
No, not at all. This automation runs on the servers of Zapier or Make.com. It's a backend process that triggers after an order is complete and has zero impact on your storefront's performance or loading speed.
Can I automate review requests to Trustpilot or Google Reviews?
Yes. Both Zapier and Make.com have integrations for platforms like Trustpilot, Yotpo, and others. You can add a step to your workflow that generates a unique review invitation link for the customer [www.bloomreach.com/en/blog/perfect-post-purchase-emails-guide-examples-and-expert-tips].
What happens if a customer buys multiple products from different categories?
You can design the logic to handle this. A common approach is to prioritize the sequence for the highest-value item in the cart or to have a separate, more generic sequence for multi-category orders.
Is this type of automation compliant with GDPR and CAN-SPAM?
It can be, but you are responsible for compliance. Ensure you are only sending marketing emails to customers who have explicitly opted in. Transactional updates are generally fine, but promotional content requires consent [starshipit.com/us/blog-content/post-purchase-email-automation-sequence-flow].
How much does it cost to run a sequence like this?
You can often start for free. Both Zapier and Make.com have free tiers that are sufficient for low-volume stores. As your order volume grows, you would move to a paid plan, typically starting around $20-$30 per month.
What is the most common mistake to avoid?
The most common mistake is being too generic. A follow-up that ignores what the customer actually bought will feel impersonal and ineffective. The power of this automation lies in its product-specific personalization [www.litmus.com/blog/post-purchase-emails].